1. Preparation of Road Layers
In the OSM layer selected, we need to filter out the Primary, secondary and tertiary roads for analysis.
Import the road layer that we had created before using the process.
We need to filter by the road attributes. Right click ont he road layer and select > “open attribute table”.
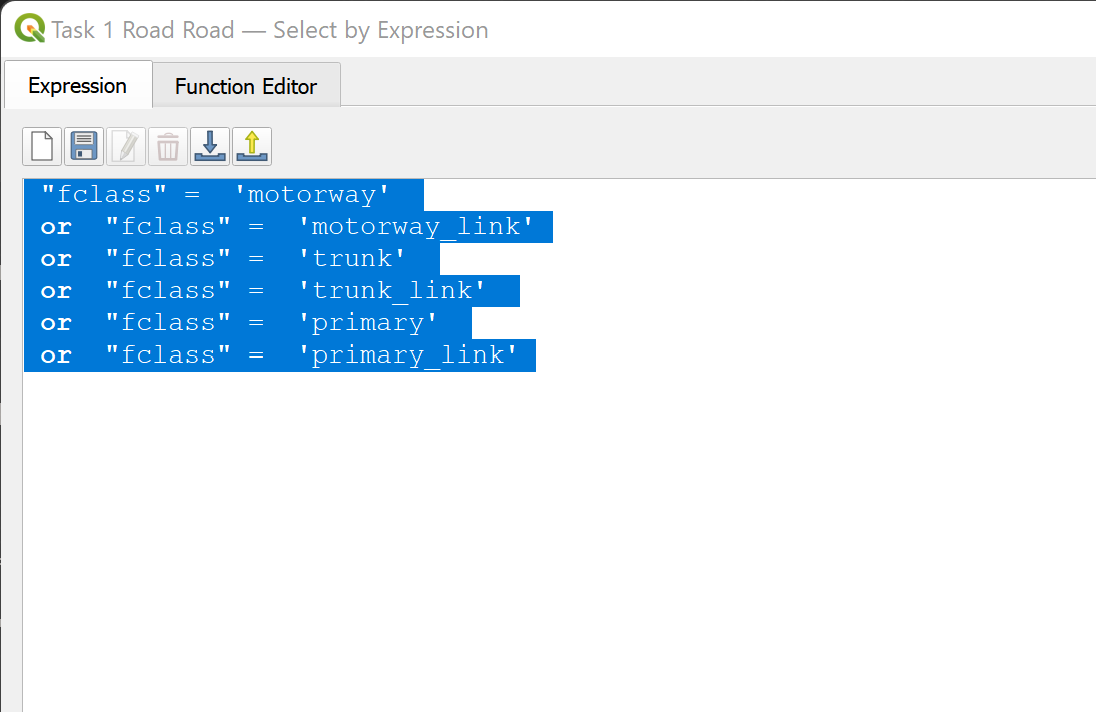
In the attribute table, we select the road concerned using the following commands by clicking on the “Select by Expression” menu:
- PRimary and Trunk: “fclass” = ‘motorway’ or “fclass” = ‘motorway_link’ or “fclass” = ‘trunk’ or “fclass” = ‘trunk_link’ or “fclass” = ‘primary’ or “fclass” = ‘primary_link’
- Secondary and Tertiary: “fclass” = ‘secondary or “fclass” = ’secondary_link’ or “fclass” = ‘tertiary’ or “fclass” = ‘tertiary_link’
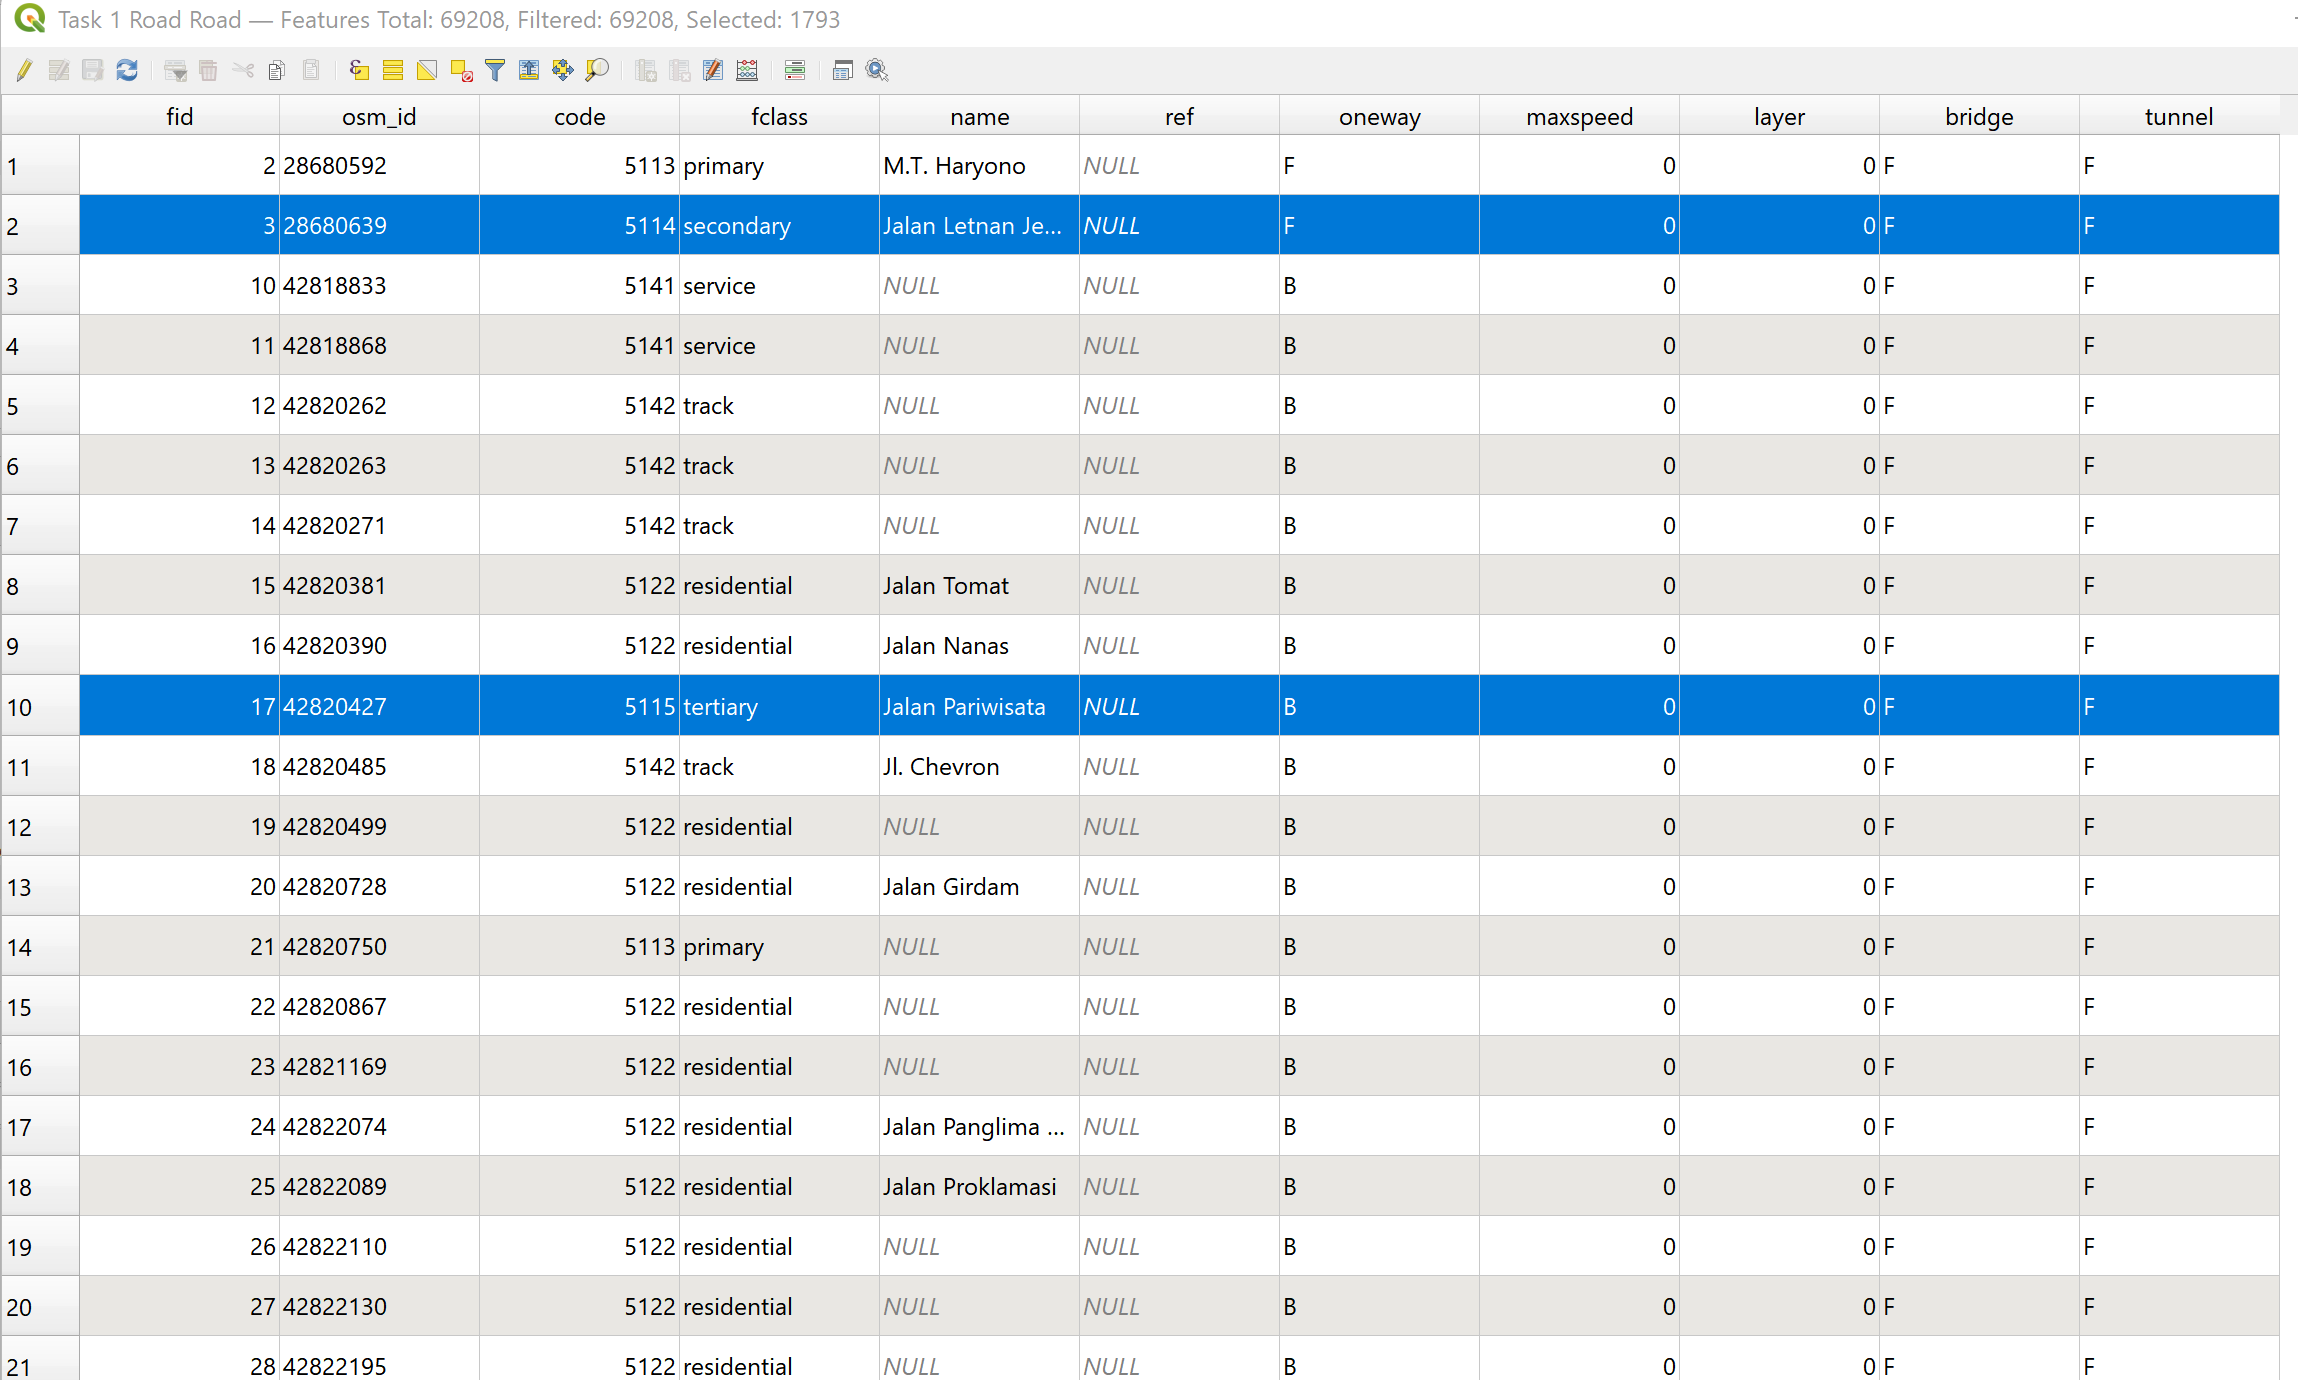
- We verify the roads have been selected; there should be elements selected in the table:
We save the layers as a GeoPackage layer. Right click on the layer with the selection > Save Selected Attributes As. In the window that pops up, select the GeoPackage for the project but save the layer as “Primary Roads”
Repeat all the above steps for “secondary and tertiary” roads.
2. Visualisation of Road Layers
- To see the hierarchy better, colour the motorways and primary roads yellow and increase their width. Right Click on the “Primary Road” layer and go to “Symbology” on the panel that opens. Click on the “Simple Line” and in the window that opens,
- change the colour to a dark shade of blue.
- change the stroke width to 0.8mm.
- Repeat the previous step for the other 2 layers (Secondary and Tertiary roads, and all roads)
- The colour for secondary roads should be a dark shade of green with a width of 0.5mm
- The colour for other roads should be a dark brown with a width of 0.3mm
- Following that, follow instructions to plot road density below.
3. Visualising Road Density
For the site survey analysis, a plot of road length against fixed distance will be used to visualise road density.
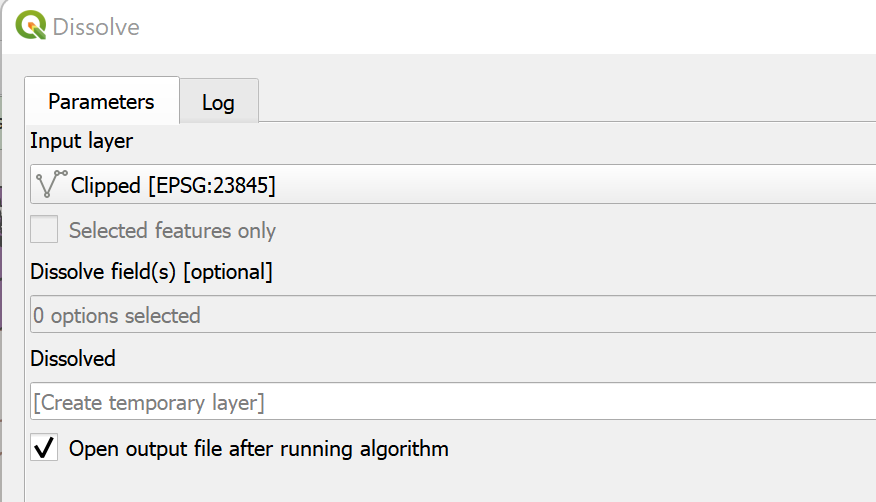
First, we need to merge adjacent road segments together in order to prevent the number of intersections from being overstated. We first go to Vector >Geoprocessing > Dissolve, and in the window that opens, select the OSM road layer as the input layer.
In the reuslting temporary layer, open the dissolved layer’s atribute table, there should only be one row of data.
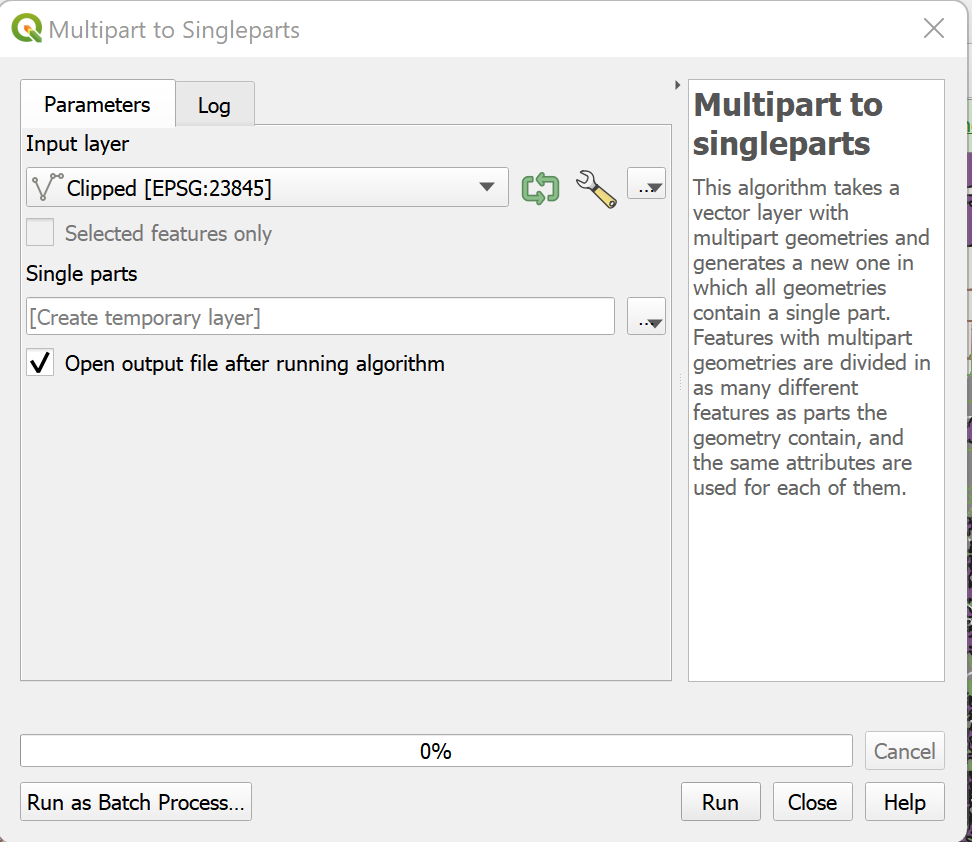
Following that, we go to the Processing Toolbox on the bottom righthand corner, and search for “Multipart to Singlepart”
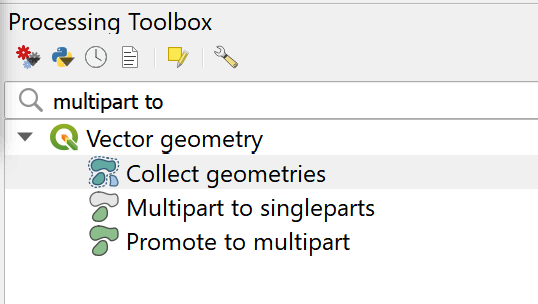
In the resulting window, just select the newly dissolved layer and click “Run”.
The final layer that is created, would be soon utilised to create density map. We save the single roads as a new layer in the GeoPackage file.
We can then create a grid. Go to Vector > Research Tools > Create Grid. Fill up the attributes as according to the below image. Make sure distance is set to 5000m, and then the shape type should be a hexagon.
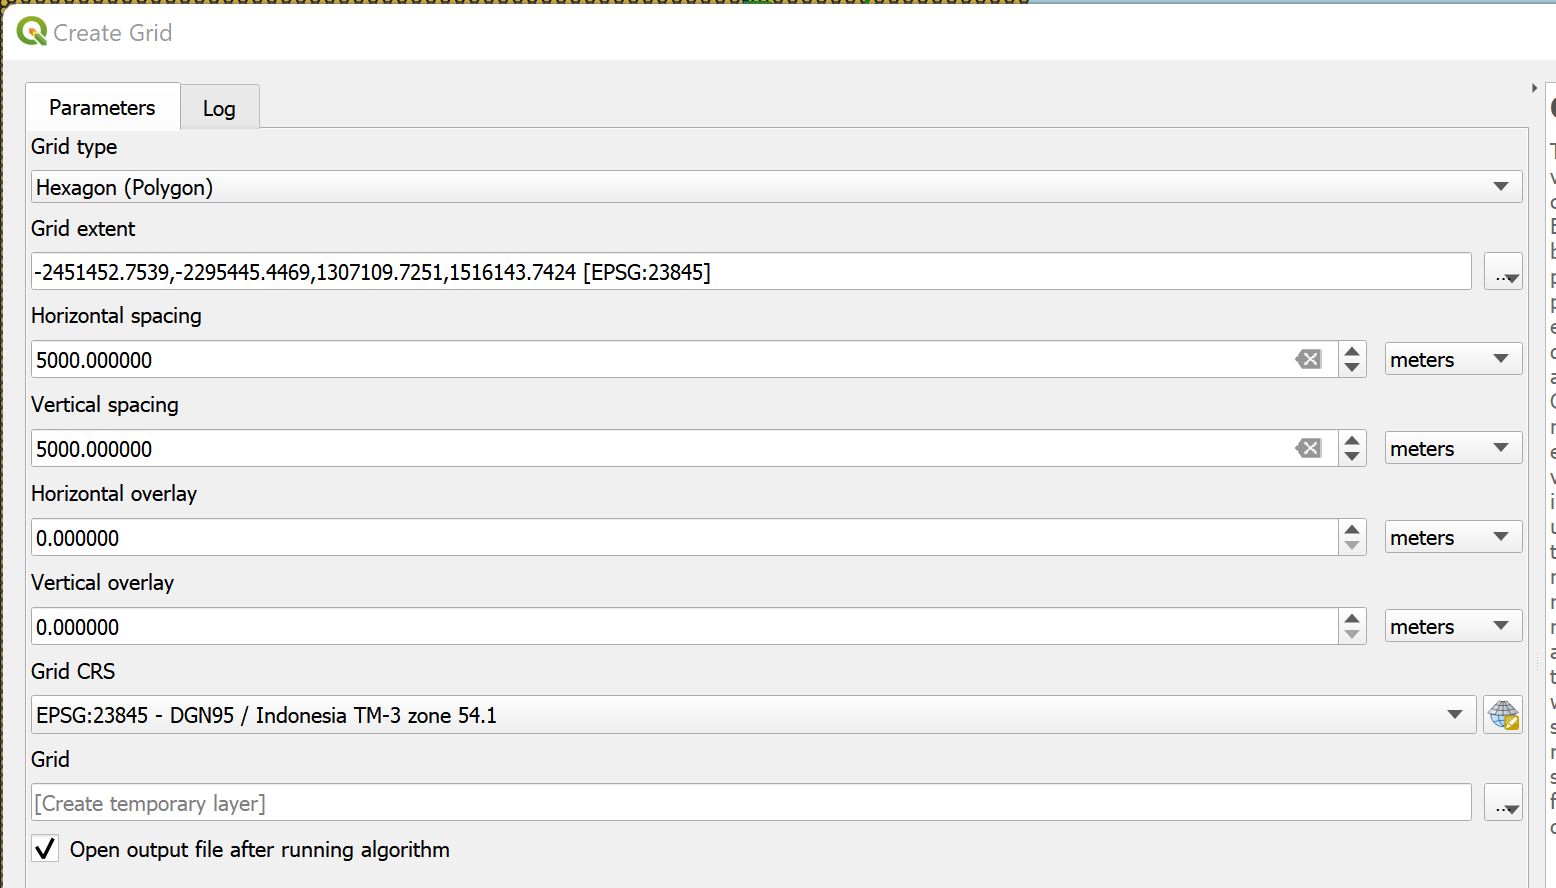
Each cell of the grid is a unit in which the density of the road network there will be calculated, with the measure of the density being length / 5x5km hexagonal area.
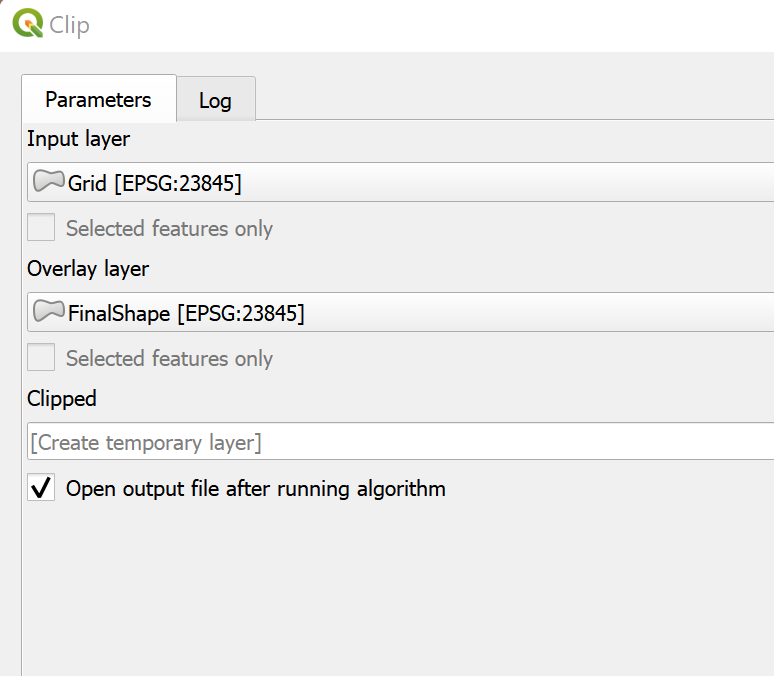
we also need to clip the grid to the study area. Go to Vector > Geoprocessing Tools > Clip on the top bar and select the input layer as the temporary grid layer an the bottom layer as the study area layer as defined before, following the screenshot and then click run.
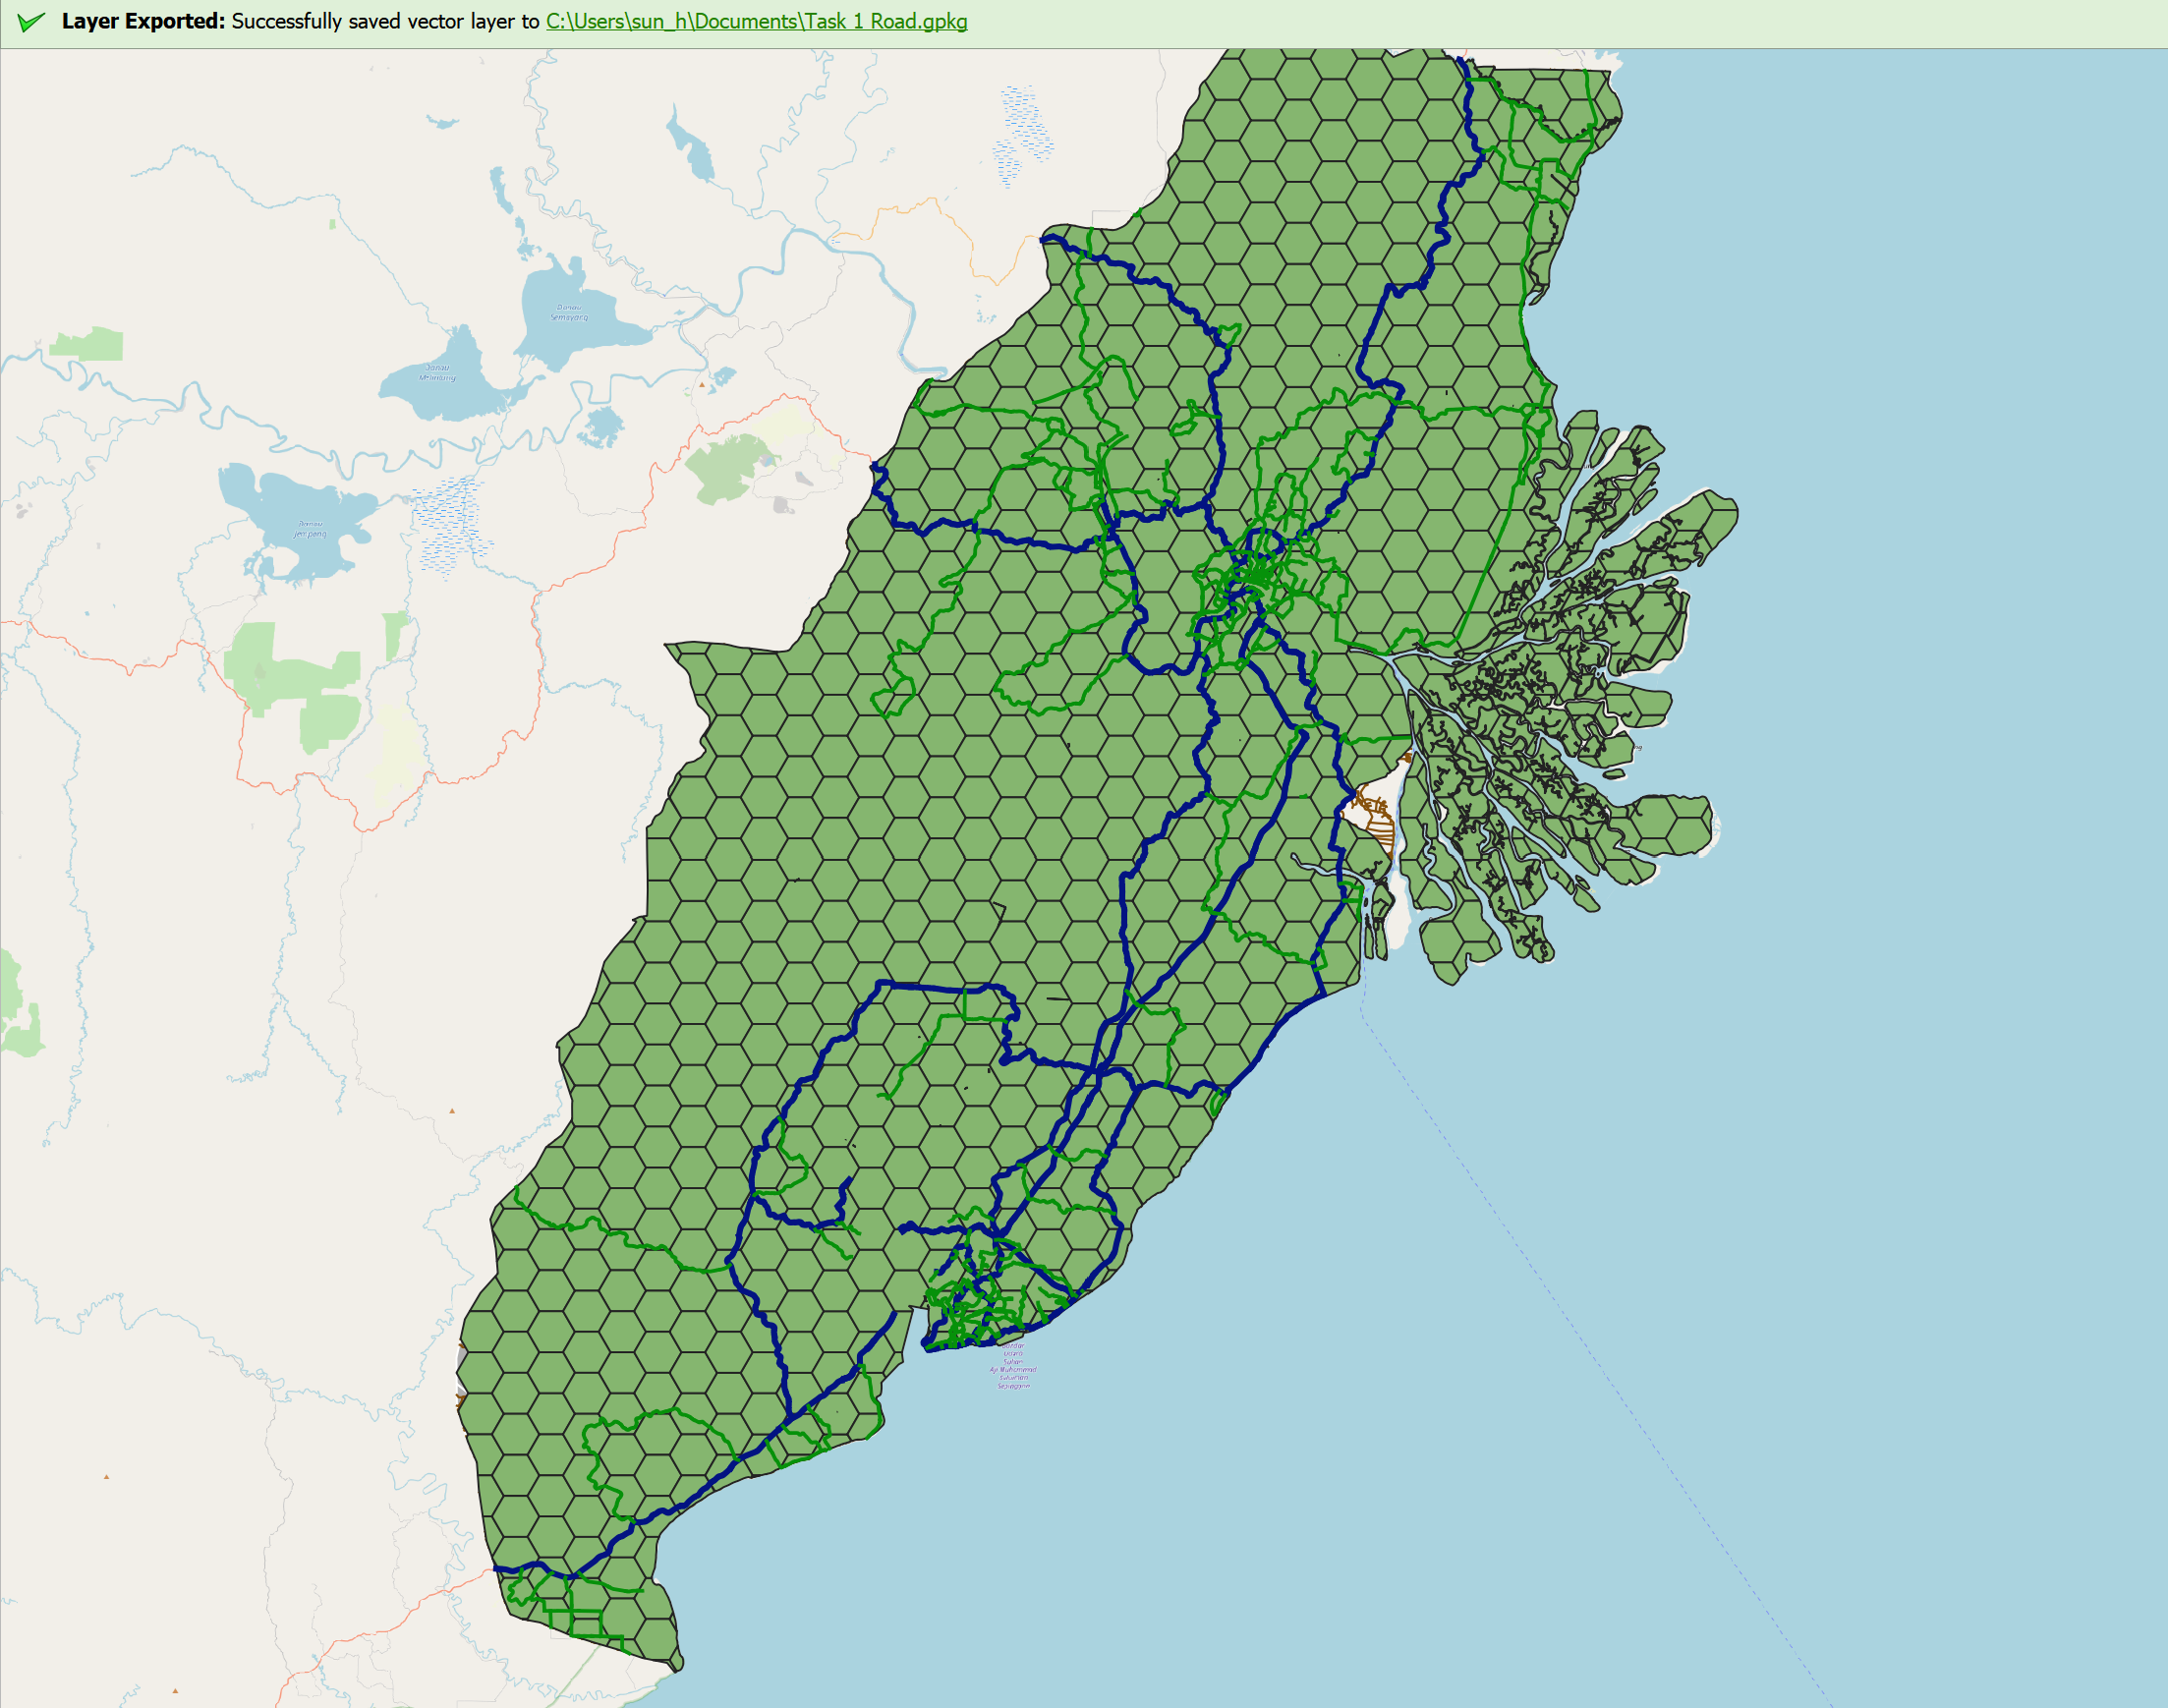
- The completed grid should look like this.
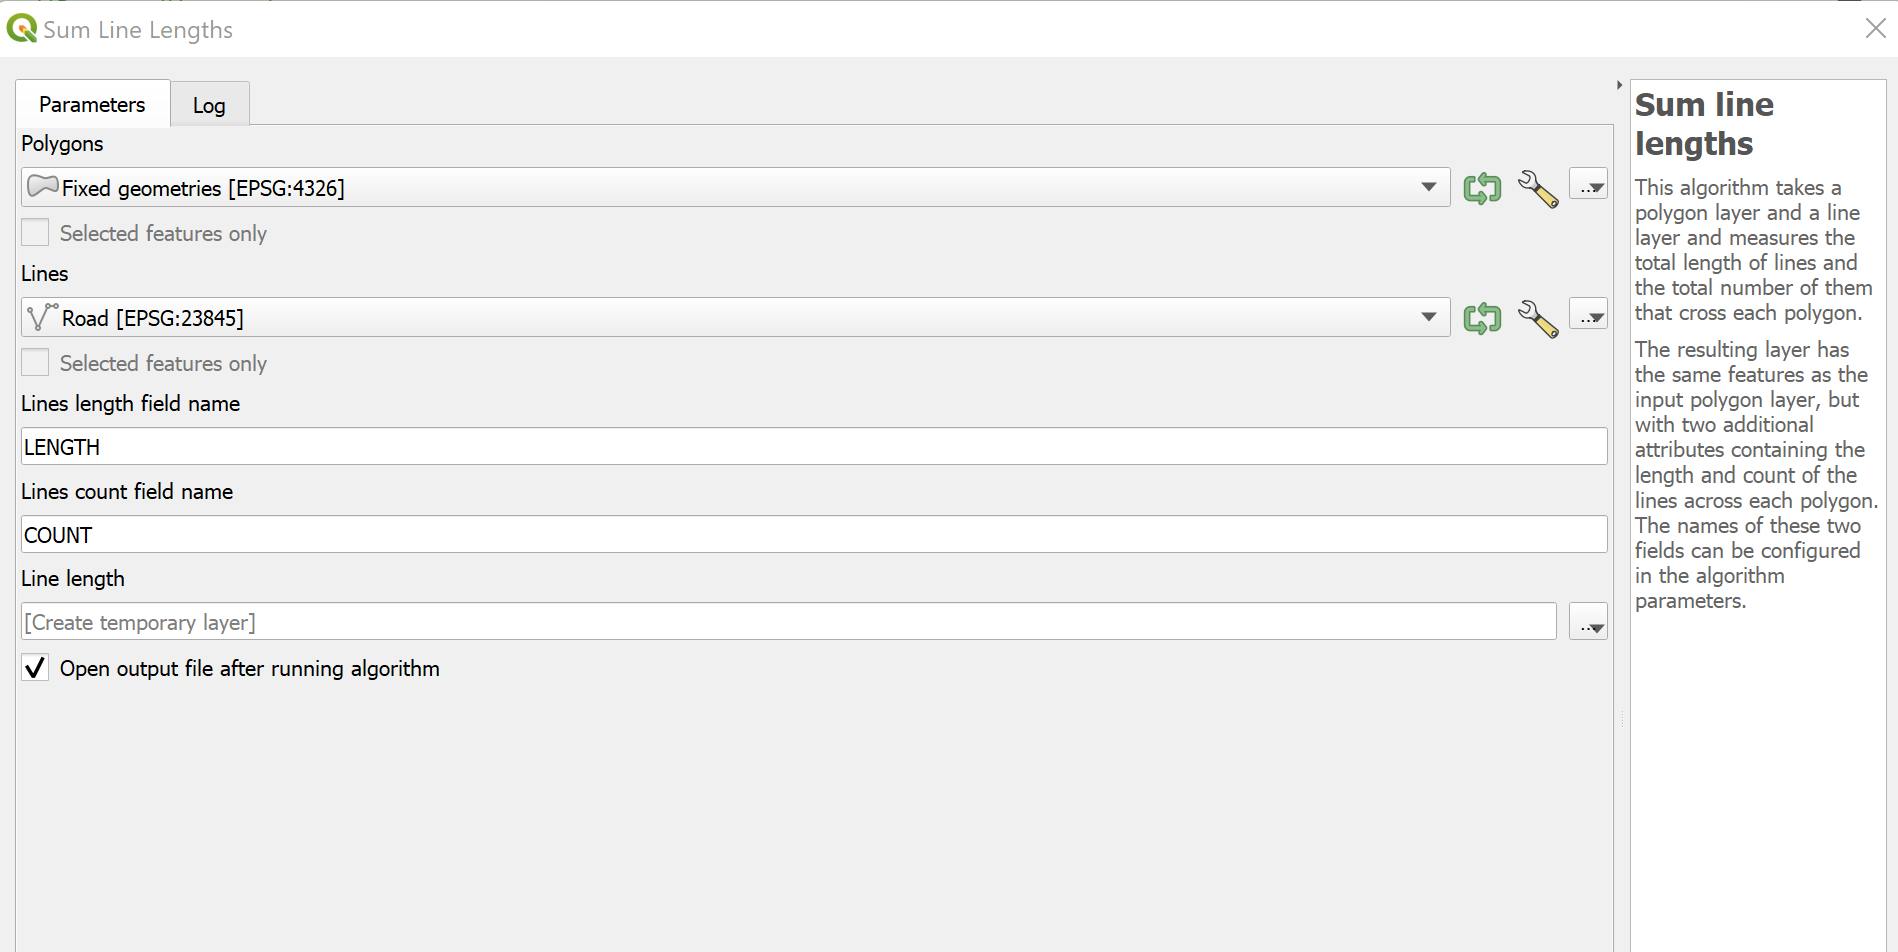
- Following that, we use the Vector > Analysis Tools > Sum Lines Length to calculate the total length of the lines in the polygon. Ensure that the roads are the input layer and the other polygon vector layer is set to the hexagon.
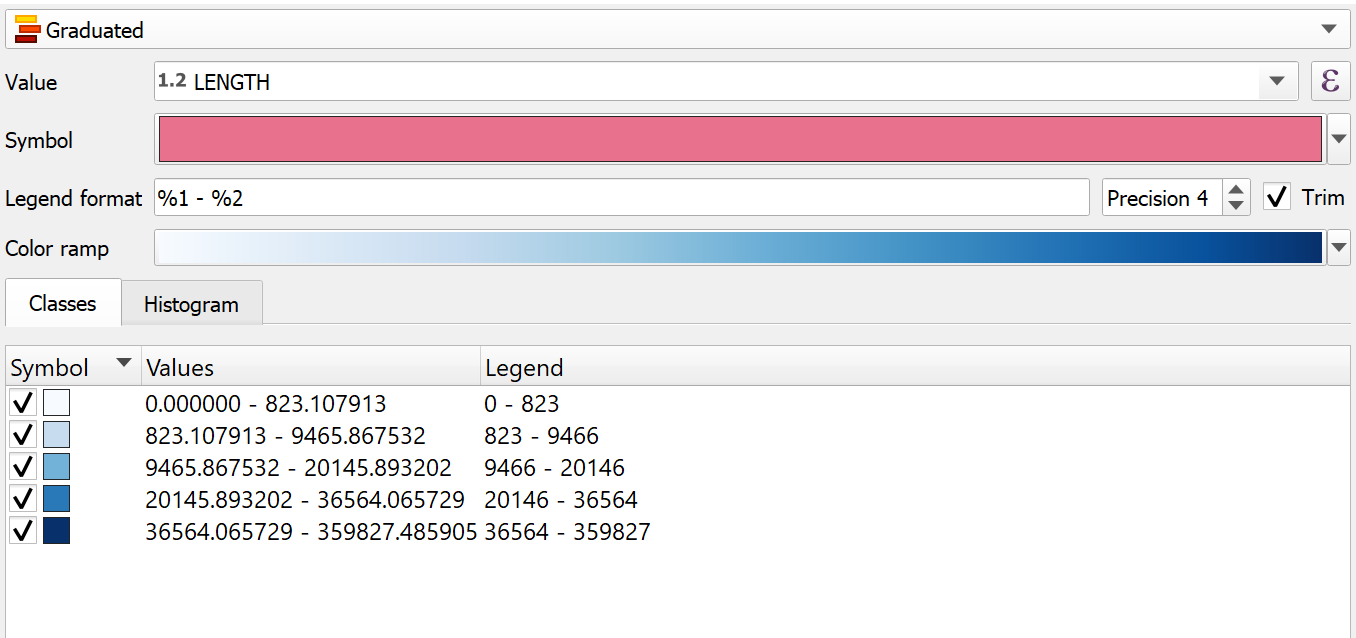
- When this is done we need to change the visual representation on the new temporary layer that is created. Go to right click on the layer > Properties and “Symbology”, change the symbology to “Graduated”, and the columns are set as “Length”. Classify the column by clicking on the classify button and then the values will appear. Leave it as equal count and press apply then close the window.
Now, the road density map is complete.